Separate your emails into different workspaces for better organization.
Plan
The number of workspaces you can have depends on your plan.
You can divide your work into multiple workspaces. For example, you can organize by brand, client, geographical region, or anything else that makes sense for your company.
Each workspace is a completely separate set of files and emails from the others.
Note: Snippets are shared on the account level, so you can use them in any workspace.
Create a workspace
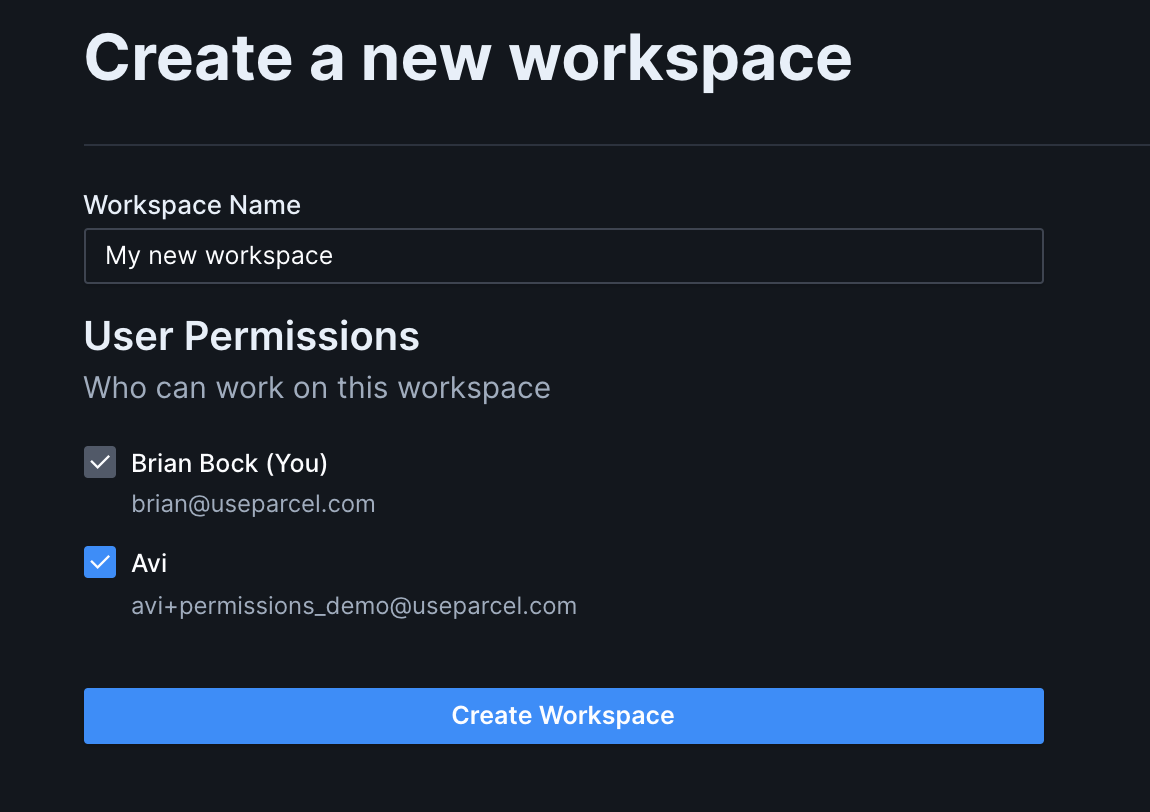
To create a workspace, open the workspace menu at the top of the sidebar and select Create workspace. In the form, enter a name for the new workspace, and specify the users who can access it, and press the button to submit. In a moment, you will be redirected to the workspace page to start creating emails in the new workspace.
Screenshot showing how to create a workspace
Switch workspaces
You can see your current workspace in the upper left corner. Click this workspace menu to switch between different workspaces. The page will reload and you will now be in the new workspace.
Silent video of the entire Parcel window. The cursor moves to and clicks on the workspace name in the upper left corner, revealing a menu containing a list of the other available workspaces, as well as options to "Edit Workspace" and "Create Workspace". The second workspace on the list is clicked, which replaces the files in the editor and file tree with files from that workspace. The workspace name in the upper left is also updated to match.
Screen recording showing how to switch workspaces
Renaming a workspace
Renaming a workspace is easy. Open the workspace menu and select Edit workspace. Enter a new name in the field and hit Enter or click the blue Update button.
Silent video of the entire Parcel window. The cursor moves to and clicks on the workspace name in the upper left corner, revealing a menu containing a list of the other available workspaces, as well as options to "Edit Workspace" and "Create Workspace". The "Edit Workspace" option is selected, which redirects the page to that workspace's settings page, which contains several sections. The top section, "Workspace Name", includes an editable text field. The original name is replaced with a new name, and then the "Update" button below is clicked. The user is returned to the editor page and the new workspace name is now visible in the upper left.
Screen recording showing how to rename a workspace
Add an image to a workspace
You can add an avatar image to each workspace. Images should be square, <2MB, and either .jpg, .jpeg, or .png. Open the workspace menu and select Edit workspace. If you do not yet have an image for the workspace, you'll see a blue circle with the first letter of the workspace name in white text. If you have previously set an image, you'll see that image. Click on the blue circle/image to upload a new image. The workspace image is visible to anyone with access to the workspace.
Silent video of the entire Parcel window. The cursor moves to and clicks on the workspace name in the upper left corner, revealing a menu containing a list of the other available workspaces, as well as options to "Edit Workspace" and "Create Workspace". The "Edit Workspace" option is selected, which redirects the page to that workspace's settings page, which contains several sections. The top section, "Workspace Name", includes a large blue circle. This circle is clicked, which opens a file upload dialog. An image is selected from the user's computer, which then replaces the blue circle. The user navigates back to the editor, where the image is now visible alongside the workspace name in the upper left corner.
Screen recording showing how to add an image to a workspace
User Permissions Per Workspace
Admins can specify who has access to view and edit each workspace. Workspaces created prior to 3/17/2022 are by default visible to all users on the account, unless subsequently changed.
Add / remove a user from a workspace
Navigate to the workspace settings page by opening the workspace menu and selecting Edit workspace. Admins will see a checklist of users. Checked users already have access to the workspace. Check/uncheck any user to add them to/remove them from the workspace, and then hit Save. You cannot remove yourself from a workspace. Admins can only edit workspaces they already have access to.
Silent video of the entire Parcel window. The cursor moves to and clicks on the workspace name in the upper left corner, revealing a menu containing a list of the other available workspaces, as well as options to "Edit Workspace" and "Create Workspace". The "Edit Workspace" option is selected, which redirects the page to that workspace's settings page, which contains several sections. One section, "User Permissions - Who can work on this workspace", includes a checkbox for each user on the account which each display the user's name and email address. The checkbox for the current user is locked and cannot be unchecked. The cursor moves to and unchecks the second user on the list, and then clicks the "Save" button below. A notification appears in the bottom right confirming that the settings were saved.
Screen recording showing how to remove a user from a workspace
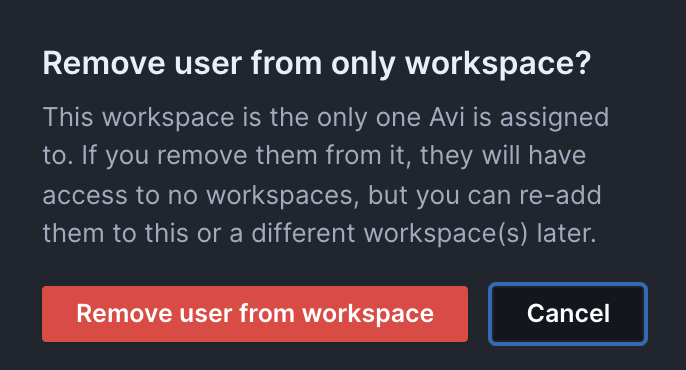
If you attempt to remove a user from their only workspace, you'll be prompted to confirm the removal.
Screenshot showing the confirmation message
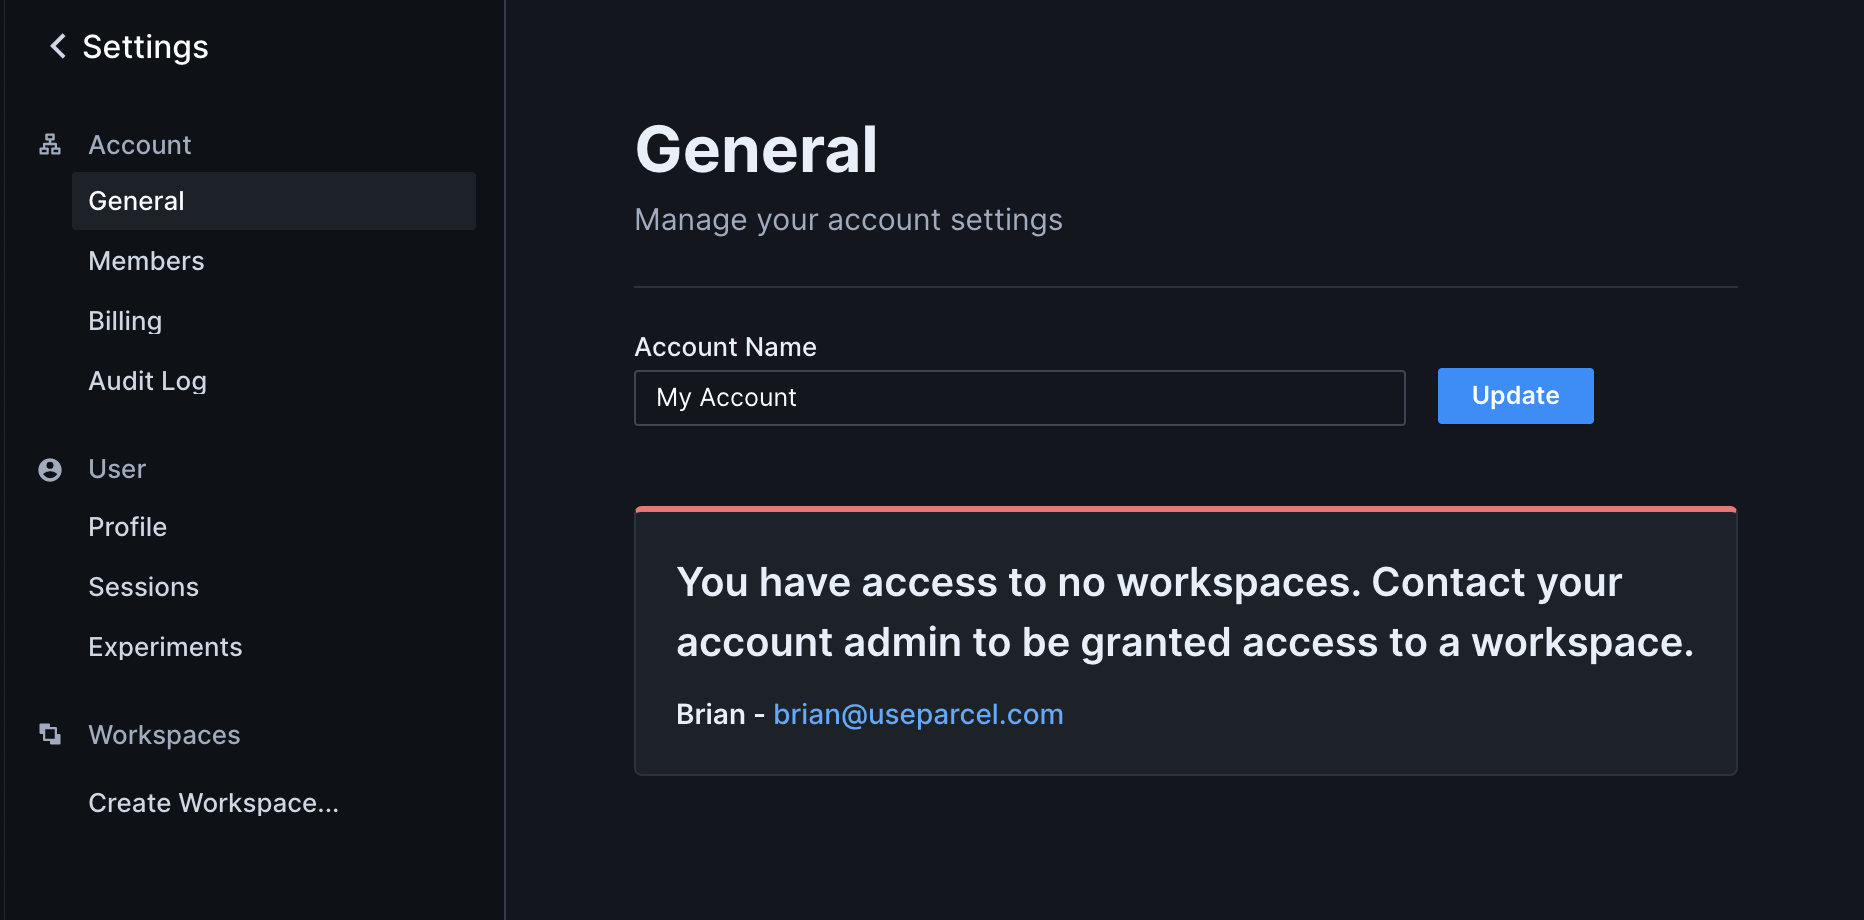
Users without workspaces can only access portions of the settings page, and cannot use the Editor.
Screenshot showing the empty workspaces page
Orphaned Workspaces
Workspaces must have at least one user assigned to be visible. A workspace without any users is orphaned and inaccessible until claimed.
Delete a workspace
To delete a workspace, open the workspace menu and select Edit workspace.
Then, click the Delete workspace button. You will be asked to confirm the deletion. This will delete all emails, files, folders, components, and assets contained within the workspace.
CautionThis can not be undone.
Silent video of the entire Parcel window. The cursor moves to and clicks on the workspace name in the upper left corner, revealing a menu containing a list of the other available workspaces, as well as options to "Edit Workspace" and "Create Workspace". The "Edit Workspace" option is selected, which redirects the page to that workspace's settings page, which contains several sections. The user navigates to the "Delete Workspace" section, which includes a red button labeled "Delete Workspace". The user clicks this button, which opens a confirmation dialog containing a red "Delete" and a black "Cancel" button. The user clicks on "Delete", and a notification appears in the bottom right confirming that the workspace was deleted.
Screen recording showing how to delete a workspace
Move files between workspaces
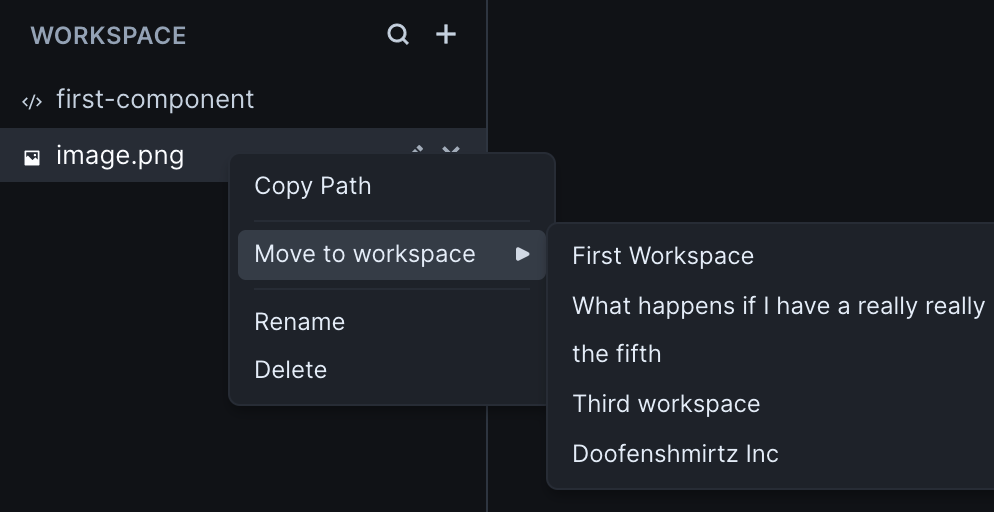
You can move a file/folder between workspaces. Right click on the file in the file tree, click Move to workspace, and select your desired workspace.
Screenshot showing the move to workspace feature
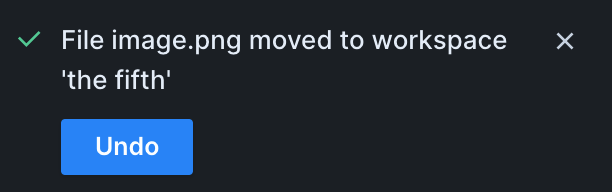
You'll be prompted to confirm the move and then the file will be moved to the top level of the new workspace. If you move a folder, all of it's sub folders and files will also be moved. When the move is successful, you'll get a success notification with an undo option. If you want to undo the move, you can do so within 5 seconds, after which time the prompt will disappear.
Screenshot showing the successful move notification with undo button
If the destination workspace already has the same file/folder name at the top level, the moved file will have ' -- Moved' and a timestamp appended to it.
Silent video of the entire Parcel window. The cursor moves to and clicks on the workspace name in the upper left corner, revealing a menu containing a list of the other available workspaces, as well as options to "Edit Workspace" and "Create Workspace". The "Edit Workspace" option is selected, which redirects the page to that workspace's settings page, which contains several sections. The user navigates to the "Daily Backup" section, which includes a toggle switch and the description "Auto version all the files in this workspace, once a day". The user turns the switch on and clicks the "Save" button below.
Screen recording showing how to opt-in to auto versioning
Workspaces Overview
To see the list of workspaces on your account, admins can go to the workspace overview page. Each workspace you have access to will have it's name listed. If you do not have access to any of the workspace(s) on the list, it'll be listed as 'Anonymous Workspace'. You can see the names and email addresses of each user assigned to that workspace.
Silent video of the workspaces overview page. There are four workspaces listed. The user clicks on the first workspace, which opens to reveal the users who have access. The second workspace on the list is labeled "Anonymous Workspace". The user clicks on this workspace, which reveals the following message: "This workspace has no users. Claim it to be added as a user." The user clicks the Claim button below, and a notification appears in the bottom right confirming that they have added themselves to the workspace.
Screen recording showing the workspace overview, an anonymous workspace, and claiming
Claiming a workspace
Any orphaned workspace without any users assigned will have a Claim button. Click this button to add yourself to the workspace and recover it from the void. If you are unable to claim an orphaned workspace, please contact support.